Greenhouse Parts List-6'
x 9'(approx.)
| Prt |
Qty |
Description |
Prt |
Qty |
Description |
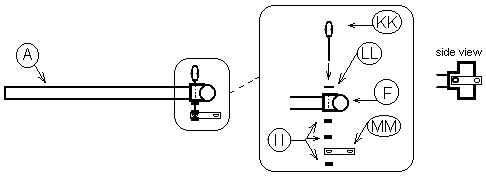
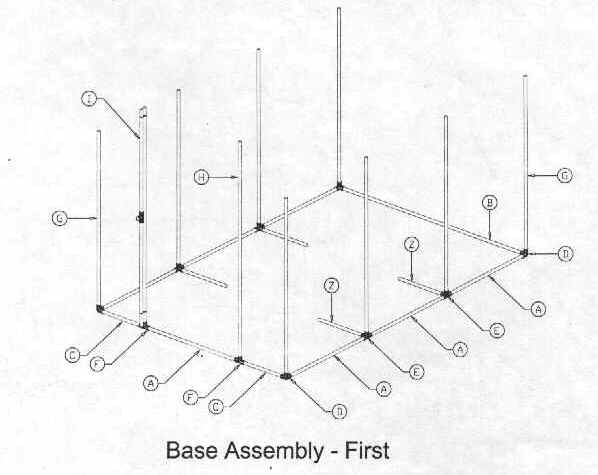
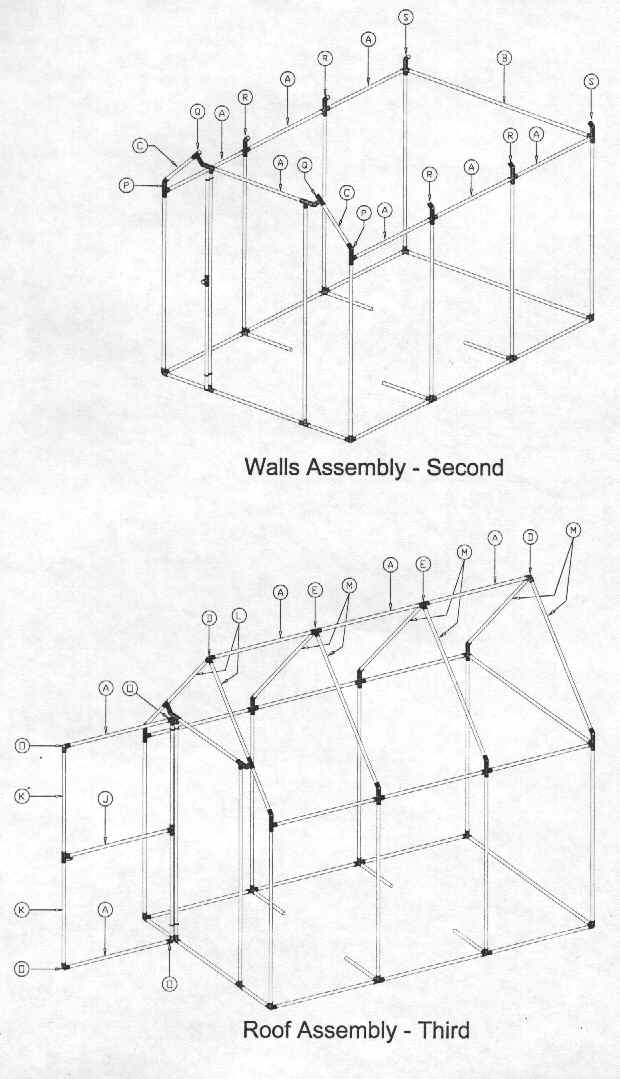
| A |
20 |
36 inch tube (1 inch sch. 40 PVC) |
B |
2 |
72 inch tube (1 inch sch. 40 PVC) |
| C |
4 |
16-1/2 inch tube (1 inch sch. 40 PVC) |
D |
6 |
3-way L - 1 inch (Circo item
#33) |
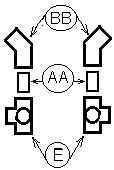
| E |
8 |
4-way LT - 1 inch (Circo item
#43) |
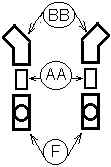
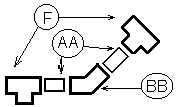
F |
10 |
Tee - 1 inch PVC fitting |
| G |
8 |
58 inch tube (1 inch sch. 40 PVC) |
H |
1 |
71-1/4 inch tube (1 inch sch. 40 PVC) |
| I |
|
Door Hinge - (will assemble) or try
this one |
J |
|
Door latch - (will assemble) |
| K |
2 |
34-1/4 inch tube (1 inch sch. 40 PVC) |
L |
2 |
32 inch tube (1 inch sch. 40 PVC) |
| M |
6 |
50 inch tube (1 inch sch. 40 PVC) |
O |
4 |
L/90 - 1 inch PVC fitting |
| P |
|
Connector 1 lft, 1 rgt. - (will
assemble) |
Q |
|
Connector 1 lft, 1 rgt. - (will
assemble) |
| R |
|
Connector. - (will assemble 4) |
S |
|
Connector 1 lft, 1 rgt. - (will
assemble) |
| T |
1 |
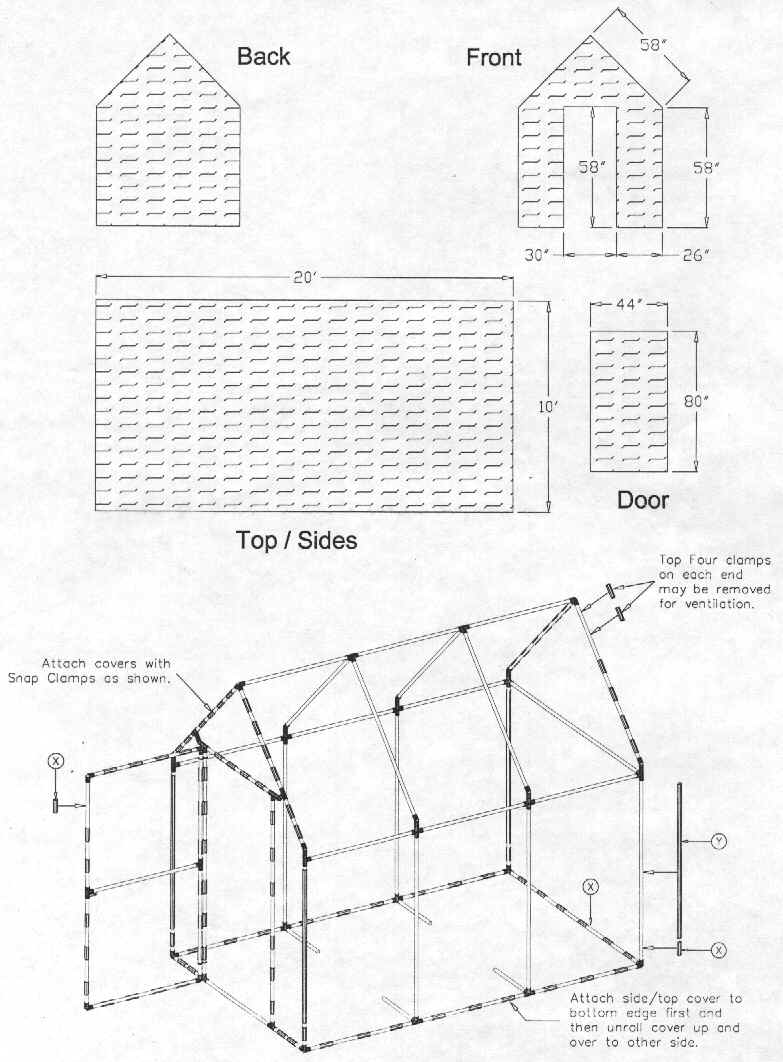
Top/sides Cover (see bottom page) |
U |
1 |
Back Cover (see bottom page) |
| V |
1 |
Front Cover (see bottom page) |
W |
1 |
Door Cover (see bottom page) |
| X |
98 |
Snap Clamps 4" X 1" ( Item #13) |
Y |
4 |
Snap Clamps 4' X 1" ( Item #03) |
| Z |
4 |
18 inch tube (1 inch sch. 40 PVC) |
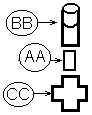
AA |
12 |
1-3/4 inch tube (1 inch sch. 40 PVC) |
| BB |
10 |
45 degree - 1 inch PVC fitting |
CC |
4 |
X /cross - 1 inch PVC fitting |
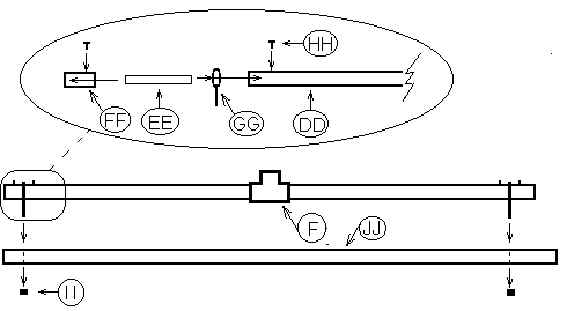
| DD |
2 |
31 inch tube (1 inch sch. 40 PVC) |
EE |
2 |
8 inch Metal EMT conduit (3/4"
dia.) |
| FF |
2 |
3 inch tube (1 inch sch. 40 PVC) |
GG |
2 |
3/8-16 x 4" Steel Eye Bolt |
| HH |
4 |
| Metal screw 8 x 3/4 (Pre-drill PVC and |
| conduit. Conduit should be tight against PVC) |
|
I I |
5 |
3/8-16 Lock Nut |
| J J |
1 |
71-1/2 inch tube (1 inch sch. 40 PVC) |
KK |
1 |
3/8-16 x 5" Steel Eye Bolt |
| LL |
1 |
Thick washer (plastic preferred) |
MM |
1 |
5/16" x 2" U Bolt Plate |